Monday, October 31, 2011

To Find a Water line!


At this point, I had four coats of epoxy on the entire hull. It was time to finish off with the varnish and or paint depending on the area. I wanted to put the PMD in the water and find the dynamic water line. What I mean is that plans are nice, but how does this boat handle and where do I plan to have the paint start, and where should the bottom paint be. I was planning to keep the PMD in the water in the same spot as my 8' zodiac used to be. I planned to remove the bow, put it in the hull and have a cover made to keep the rain out. This first adventure helped alter my plans. 


Birth of a PMD! First look at sunshine. Having fit through the door all the neighbors bet against, the PMD was on its way to some cold water on a sunny day in May. I hope you like the expense I went to for the car rack. I got two 2X4s and clamped them onto the cars luggage rack. I spent almost $15. See, I am becoming a sail boater already!!


The launch! Seems kind or un-ceremonious. No bottle of campaign or anything. This is a research project and not really a boating event. Will it float?


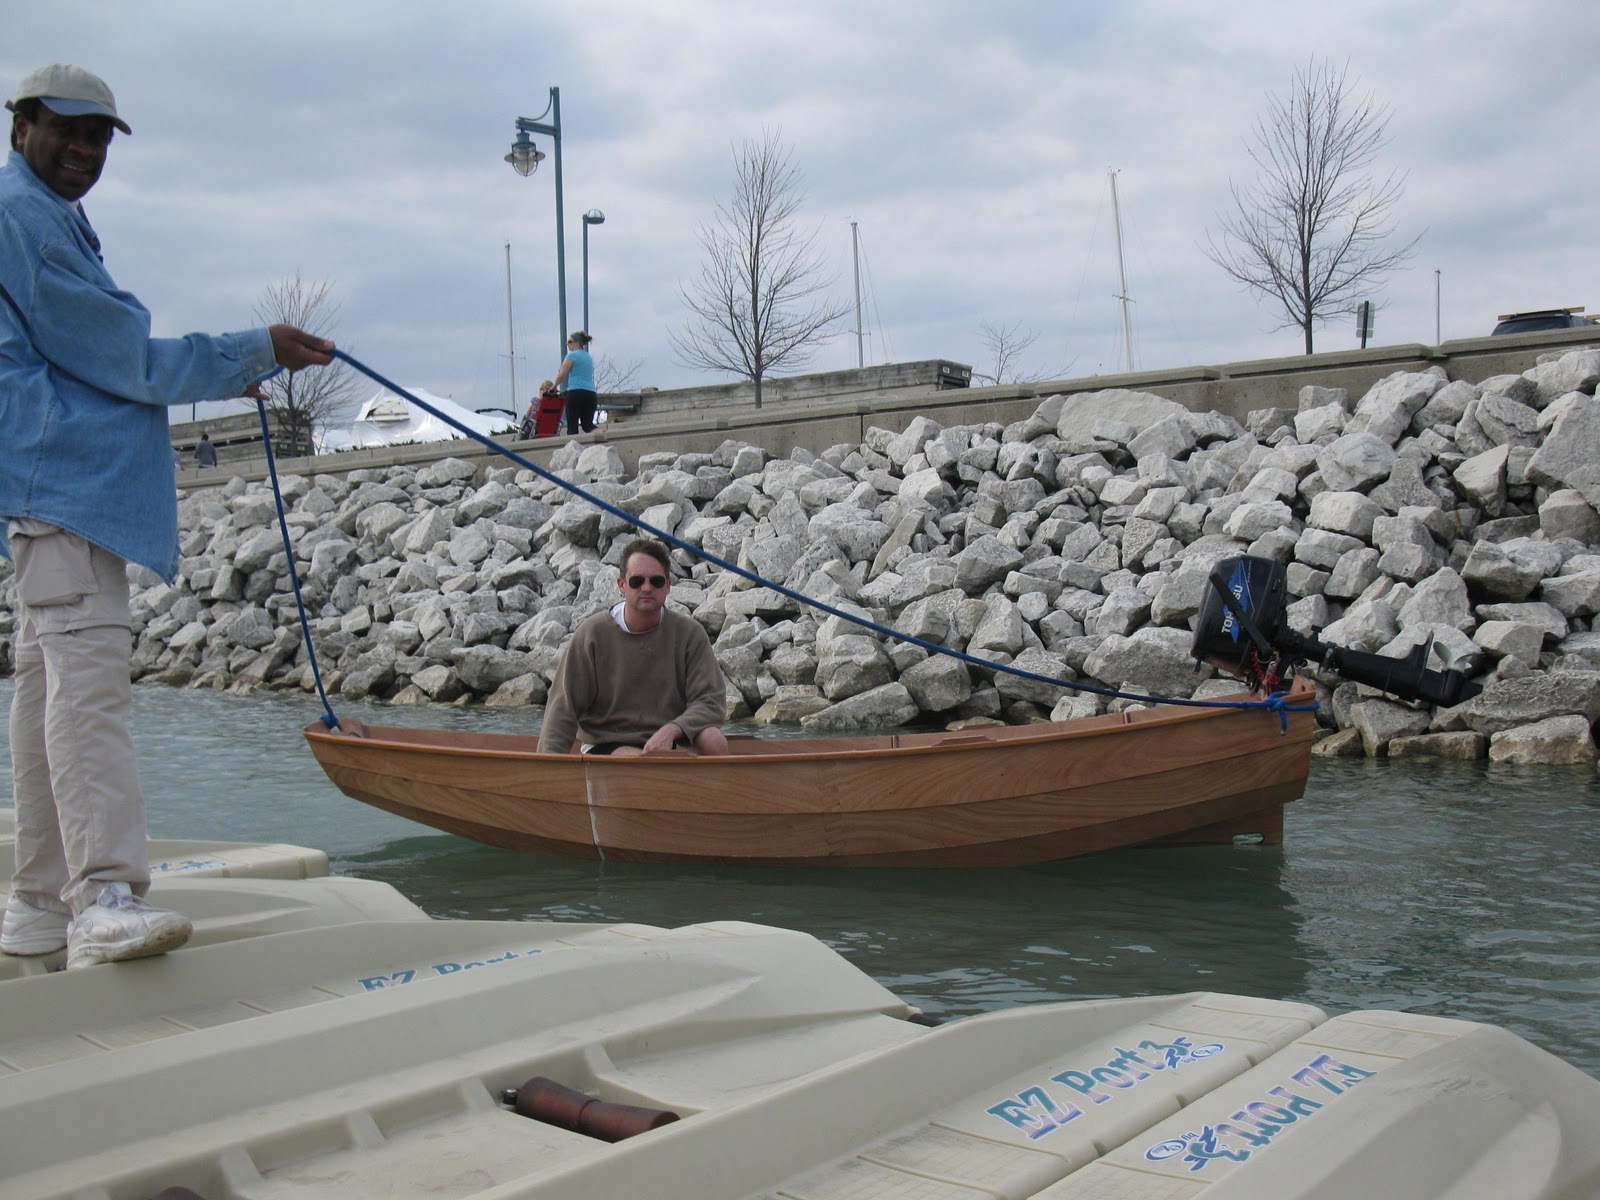
Yes it floats. You may notice what I wondered about. The PMD seems to be quite sensitive to the weight of the motor. This surprised me. It should not have. The PMD only weighs 90 pounds, the motor weighs 55 lbs. thanks to the new 4 stroke design. 

This is a 6 hp motor, The 4, 5 and 6 hp all weigh the same but do not cost the same. It is interesting that they only change the timing and carb to get the different hp. I already had this motor. If I would choose one now, I would get a 3 or 4 hp used two stroke. Lighter and plenty of power. 


I will now answer the questions you may have. How did the PMD handle with that large engine, Did you flip it over, Did you get arrested? did it break off the transom? Did the world end?  No it was just fine. Ideally you need two people when motoring, even with a lighter engine. This will balance the boat. This boat handles better with a little weight in it! 


If you are going to motor by yourself, you will need an extension on the motor handle so you can operate it from the middle seat or the floor. The boat is nicely balanced with my weight in the middle. In trials, I found the PMD will plane out under full power, if I sit forward and it is calm. It is not a planning hull nor is it a full displacement hull . It is a pram! I found a sweet spot of about one half throttle that uses very little gas and glides thru the water.

You can see the stern lifting when my weight is forward even with the engine. 


The PMD is very light and has minimal displacement. The water line is on the fourth plank with no weight on board!


This is the best place to sail the PMD. I am 6' tall and weigh 200lbs. I weigh more that the fully sail rigged PMD does. Where you sit has a huge influence on the trim of the PMD.  It actually sails better with 2 people. More displacement thus more waterline, wetted surface and hull speed.


The PMD is an excellent row boat. With one person you sit in the middle an use the rear oarlocks, with 2 people, the passenger sits in the rear seat while the rower sits in the forward seat and uses the forward oarlocks. This provides good trim and balance. This boat is so light in the water, it just glides. It really goes fast when you row and you can cover a great distance with little effort.

The first time I put the PMD in gear with the motor, I was amazed how fast it went at idle speed, My zodiac with the same engine at idle was much slower. Easier to push a slender shapely hull than a square shape!


I took a lot of pictures and now have a good idea of how I want to paint the PMD. Removing the bow is not a thing I think I will want to do every weekend. I may need a full length cover. Make sure and "drill fill drill" (drill oversize hole, fill entire hole with epoxy, then drill correct size hole through the epoxy.) the holes for the studs that hold on the bow, it is easy for the threads on the bolts to damage the plywood. Epoxy can take the punishment and it is not so easy to line up the bolts! 

Time to go back to the shop and finish this boat!

With one flick of his mighty tale he cut the dinghy in two!


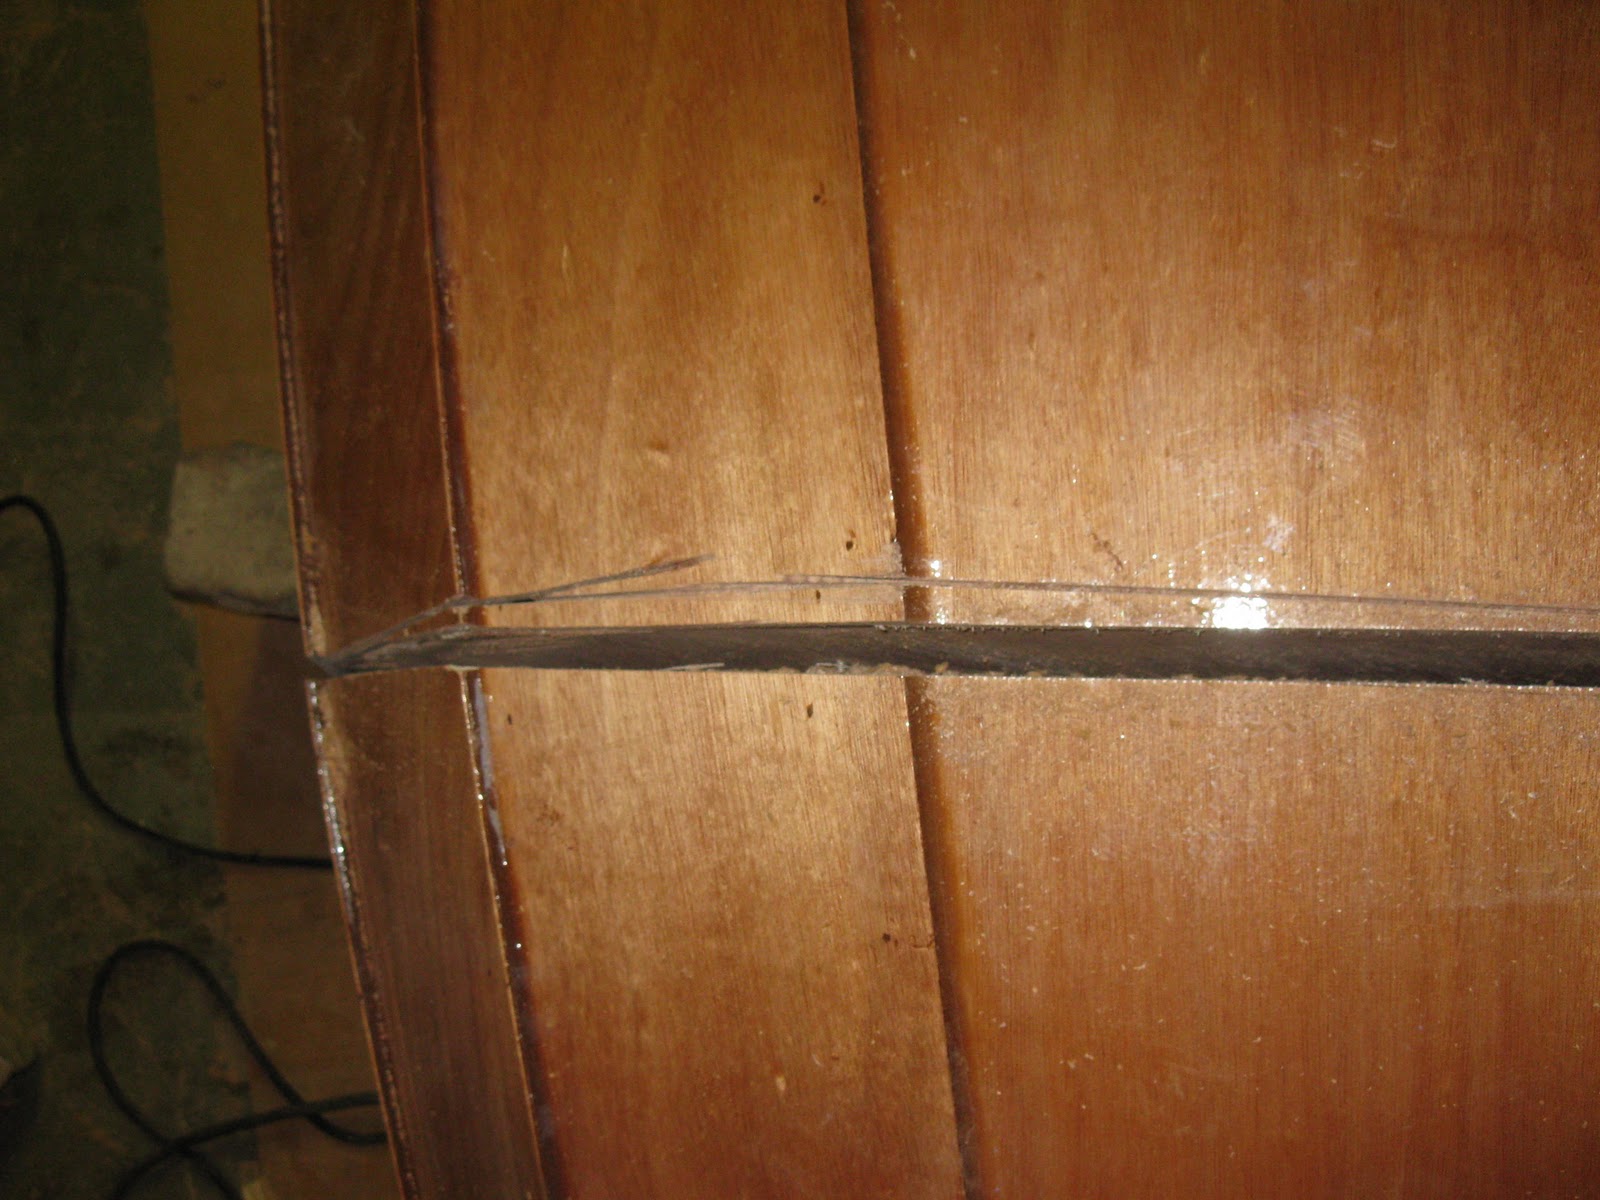
The whalers were locked in a life and death struggle and lost, I cut my dinghy in two on purpose!  In some ways, my chop job looked like a whale had smashed it. This is the part of the build where I upon the instructions took a long saw and cut in between the two forward bulkheads and separated the two parts of the Take apart passagemaker dinghy.

NOTE: you may notice there is a 6 month gap in this blog. It is called boating season. during boating season there is no time to write blogs and barely enough time to work. It is now Oct 31, and the mother ship and the PMD come out of the water this week. I put at least 40 hours, mostly sailing. on the PMD. I also motored and rowed almost every day. The PMD was quite a hit and the envy of all the sailboaters who cannot understand how a powerboater can build a sailboat.


Surely one cannot be both a sailboater and an powerboater, why thats like being a republican and a democrat at the same time! impossiable! They would motor past in their sailboats to the lake and I would hear them say, "You know he built that boat himself, He should sell his powerboat and get a sailboat!" They would stare at it and wonder how it was built. Some wondered how old it was!  haha. Back to the construction story:

If I could have a "do over" for any part in the build, this would be it. I did it all by myself, a mistake. I had never seen this done before and I was in a bit of a hurry and overconfident in my abilities. In the end, one can hardly tell I messed it up but I did cost myself a few hours of repair work. I would say almost anything can be repaired in this process so don't worry if you screw it up now ant then, it gives the boat some character.


The mistake happened almost at the beginning. The saw did not want to follow the piece of cardboard build in between the two bulkheads. The saw slipped in between the cardboard and the bulkhead and started cutting the bulkhead from the first draw. This led me to think that the resistance was normal. You are cutting the outside planks and the rub rail but you need to keep the saw straight in the middle of the cardboard. 
I got off track several times. Stopped and made corrections. Finally, I found the correct path for the saw. Now, I could do it much better, but with out watching it one time, its a little hard. If some one would put a you tube video of this that would be great for others.


I tried to snap a chalk line to help me to visualize the path for the saw and I started cutting from the bottom of the boat. Both were mistakes. I also cut it on the floor, not on the horses like the book says. You need at least another person and to do it on the horses, cut from the inside of the boat and let the bulkheads guide the saw.
Finally the agony was over, and the boat was in tow pieces. I was actually wet with sweat all over. Not the work but the pressure of screwing up the whole project. Now I know you cant screw up the whole project. Almost anything can be fixed.

But look at the damage!!!


I did not take many pics of the repair process but basically, I just used epoxy in layers, sanding and more epoxy until the surface was smooth and then I painted. Planned anyway!


Above is the raw patch and below is the finished work. 


The bow was the same, layers of epoxy, then sanding, then paint. 


I filled all the saw marks with epoxy and it never leaked or really could be detected except for one area in the inside of the bow bulkhead. No one has noticed that patch yet! Remenber as you build your PMD, 99%  of the flaws, only you will know where they are. Or maybe another PMD builder!


Sunday, May 22, 2011

Modifications to Construction

When I unpacked the kit, the panels seemed very thin, I was surprised that 6 mm was enough. It was hard to put it into perspective unpacking the box, I was thinking oh oh, I spent a lot of money for a toy that will be broken in a season. I can assure you the PMD is no toy. Once you put the seats on you will understand, it really becomes a boat then. Think about a aluminum row boat, they can really take a beating, how thick is the hull? Enough said.

Writing this blog in reverse has its advantages, Today, after the fog lifts I intend to go sailing on Lake Michigan, it is predicted to be 1-2 foot waves with a south wind at 10-15 knots with 20 knot gusts. The PMD can handle this with no trouble. I did however make a few modifications in both construction and rigging. In this post I will cover the modifications to the boat itself.

I added a 12X18 hatch and storage box instead of a deck plate. It has a water resistant seal and the storage  box is removable. I think it is water proof but the manufacturer plays it safe with the wording. I will not repeat what has been written in other PMD blogs about installing this. It is straightforward yet care must be taken to measure correctly. I am building a take apart version. When you cut the boat in half you will remove material, changing the measurements for the mast stop plate in relation to the hatch. When you add the gasket you will add distance, in the end it is a wash.


Below, I reinforced the deck for strength and to be able to use a 1" screw size.


Below the shot shows the 18mm mast support with a notch cut out to receive the mahogany deck support. This firmed up the deck and added compression support from top to bottom. Dry fittings are important to get it just right before you epoxy it all together. I would have liked to add a support on the hull to receive the deck supports but at this point, I was not confident where the deck will end up on the hull. As it turned out, locating the deck and gluing it on was a bit of a challenge. I needed to use the trick in the CLC manual with a clamp and stick to hold the deck close the the hull to get it epoxied in place. Great idea CLC!


My next modification was due to my new outboard. Thanks to Al Gore and all his tree hugging friends, two cycle engines are gone, four cycles suck! My engine weighs 55 lbs yet is only 4 hp. A two cycle that weighs 55 lbs would probably be a 10 hp. I really would like to find a 2 or 3 hp used two cycle, perfect for the PMD.

I read in the PMD forum about the guy that damaged his PMD by slamming it into gear at full power, so with a 55lb motor, I decided to beef up the transom a bit. I decided to use two knees instead of one. I also noticed in his pictures that his plywood failed as only the top layer was holding everything together. The weak link is the plywood. In reality, the epoxy in all the fillets sticks to the epoxy of the deck surface and that sticks to the plywood.
I made up two supports to go under the knees just below the deck. I added a compression plate to support the motor all the way down to the bottom panel and ended up with a three sided box. Here is how it looks.


At this point, I drilled a pilot hole thru the knee and deck and into the support. Once I assembled the seat, I  added a lag bolt to pass any load to the entire structure rather than rely on the plywood veneer glue to hold my motor on. I did the same thing at the top of the knee drilling into the motor plate.

I changed out the motor plate and used 18mm there too. Using a support box under the seat ended up being a really solid modification and supports the engine weight well. If I had not already spent $1600 on the engine for my zodiac, I would have used a smaller, lighter engine. With only 90lbs of displacement, and VC17, the PMD goes twice as fast at clutch speed than my zodiac did!

This boat moves so easy through the water, if you fart, you speed up! So far, I have only been at speeds just above idle and already I am past the harbor speed limit with NO wake at all. Nice! It will be interesting to get out into the lake and see how it handles more hp. I am not too sure if it will plane yet but I will let you know. Your weight really effects this boat. I find that I will need a tiller extension for the motor. With only one person, you have to be in the center seat. With two people, you can sit fore and aft just fine.

I put the cutout from the deck hatch in between temporarily so you can see how it works and as my dry fit. I also added a mahogany brace to help support the seat on the transom.


Saturday, May 21, 2011

The Dagger Board Box Debacle

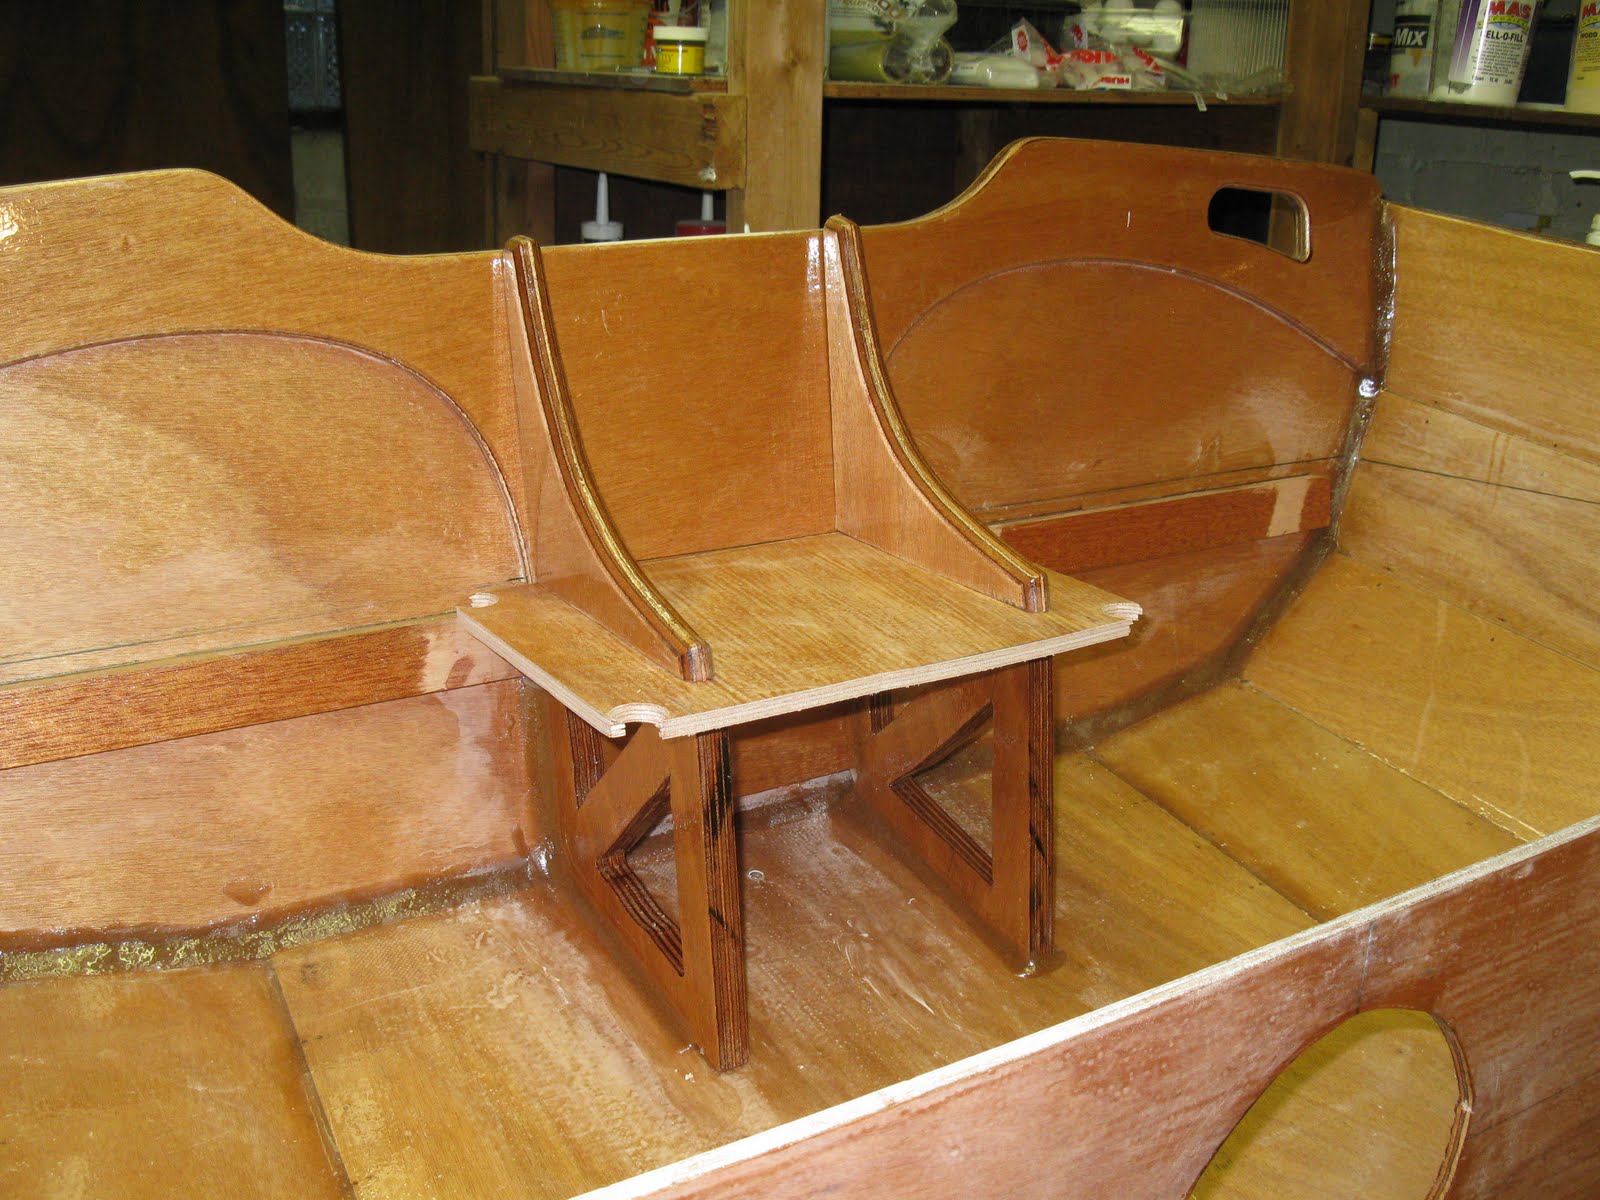
When I built the center seat assembly, I used 6 clamps to assemble the dagger board box as shown in a picture in the PMD manual. The problem was that the plywood had a warp in both the side pieces. This sometimes is the case even in high quality plywood like Okoume. Humidity can be a factor in warping. I knew I had a warp, but I could hold the box assembly in a correct position with a little pressure. I figured the clamps would be about to hold the wood in a correct position and the epoxy would freeze the assembly in the correct position.

Note: Part of being a good carpenter is overcoming flaws in wood. Wood is natural and warps, bows twists and all mamner of deformations. I once watched a very expensive piece of solid mahogany twist and bow badly after it was cut to shape. The saw released some pressure in the grain and it was amazing to actually see it twist.

You can see the mast support in the right of the picture. Actually, It is not the one that came with the kit. I had a 4X8 sheet of 18 mm Okoume left over from replacing the rear bulkhead and deck house wall of my Chris Craft, so I used 18 mm for several pieces including the mast support, rudder, dagger board and a motor support structure that I will show you in a later post. It was not necessary, but as I had the material, I liked the idea of more substantial parts in load bearing places.

There were slight warps in the 12 mm rudder and dagger board parts in the kit. I did not want the rudder and dagger board "fighting" each other while sailing. Obsessive, I know but I am even using VC17 on the bottom for speed as well as the fact that I leave the dinghy in the water all season. I may even try some dinghy racing so speed could be a factor.

In the end, I though the clamps were sufficient and it looked OK when I applied the expoy. I was wrong, the clamps I used were too weak to hold the warp in the correct position . When I came down the next day, I found the assembly was warped in two directions. It was not too bad and I convinced myself it would be OK once I glued it down on to the rest of the seat assembly. I was in a hurry to get going and had my rose colored glasses on that day. So, I went ahead and completed the assembly. Once I put it in the boat for a fitting, I realized I had made a mistake. Here is the warp highlighted by the quick angles.


Sooo...I decided to replace the dagger board box and fix the twist. This was quite the project. I came to realize just how strong this method of construction is. If you do not have a multi tool, GET ONE! they are worth every penny. It made this job easy. It does a great job of detail sanding as well.


Here is what the seat looked like after I finished hacking it up! Don't worry, you can fix almost all if this...and it is underneath the seat so it is not visible unless the boat has capsized!
After a coat of epoxy it looks good as new. Well almost. I only damaged the veneer in two small places. I ordered two new pieces of 6 mm from CLC and they sent them right away. I would have cut them myself, but I do not have any 6 mm Okoume.
Here is the new box curing. I added three layers of glass to the cypress side pieces to widen the box a little to accommodate the 18 mm dagger board. This worked well.

Once assembled and fitted in the boat it looked great and was nice and straight!.

Wednesday, May 18, 2011

Stich and Glue Time!

It was a challenge to get the planks to snuggle up to each other, especially at the bow and stern. I broke a lot of wire. I started in the middle and worked to the ends. The first pass I got them in the ball park and then tightened again from middle to ends until I broke the wire. I replaced it and repeated the process until the ends came together. For the final 12 inches, I had to get a friend to help squeezed the planks together and I handled the wire.


In the next step, epoxy is put into the seams. Here, I had another of my many opportunities for improvement. I made up the mix of epoxy and Cab O Sil too thin, while I wanted to make sure it got deep into the joint , I found out when I turned the boat over to do the other side that I had a lot of epoxy drip thru and actually glue the bulkheads to the hull. This added several hours of clean up and some damage chiseling the parts apart.


In the end the bulkhead seams covered up all the damage, but that was luck and could have turned out worse.


When I filled the wire holes, I used a putty knife and used a technique much like filling dry wall nail holes. I did not clean up too well and left spots that needed sanding later. When I filled nail holes in the inside and elsewhere, I used alcohol to wipe up the excess left by the putty knife. This eliminated a few hours or sanding.


Applying the fiberglass to the bottom of the boat went well. I used the suggested amount of epoxy and it spread out nicely. The inside was another story. I could not get the epoxy to spread out to the edges. I poured it into the middle as suggested in the manual. I had to use extra epoxy to wet out all the glass. In fact after I got done I added up the epoxy used and found I had used twice the amount suggested. It seemed to be OK, so I went off to bed expecting good results. 


I came down an hour later and found bubbles and many areas where the glass cloth had lifted off the surface of the wood. I worked for an hour to try and smooth it out. I finally realized It was hopeless and removed the glass from the wood. I rolled and tipped the epoxy to reduce sanding time and had a stiff drink. 

Here lies $30 worth of glass cloth and a lot of epoxy.
Oh Well still better than being out in the snow!


It worked out in the end. I found a local source for glass cloth and this time I poured the epoxy around the edges of the inside and worked it towards the middle. Sometimes common sense is better than directions.

I found a better solution to removing the wire than using a lighter. My thumb got raw flicking by Bic to heat up the wires to remove them. I used my heat gun which worked very well and cut the time by 50%. I found I could heat the wire with one hand and pull with a pair of pliers in the other. A propane torch would work too, but a heat gun is safer.

The transoms were a challenge. The stern was a dream, but the bow was harder. I would advise making an effort to attach the forward transom even with the shortest panel. I wired it too far forward and had a gap to make up for. Strangely this mistake saved me from another one later on. I did not have my glasses on and mistook a 6 for an 8 and put the forward bulkhead two inched too far forward. As I had put the transom too far forward, it worked out. I would rather be lucky than good!